How to remove duplicates in Excel ?
|
 Excel
|
Sep 12, 2024
|
8 Steps
This document will teach you how to use the built-in "Remove Duplicates" feature to identify and remove redundant data. Learn how to specify the columns to check for duplicates and how to customize the process to meet your specific needs. By removing duplicates, you can improve the accuracy and efficiency of your data analysis and reporting.
How to remove duplicates in Excel ?
|
 Excel
|
8 Steps
1
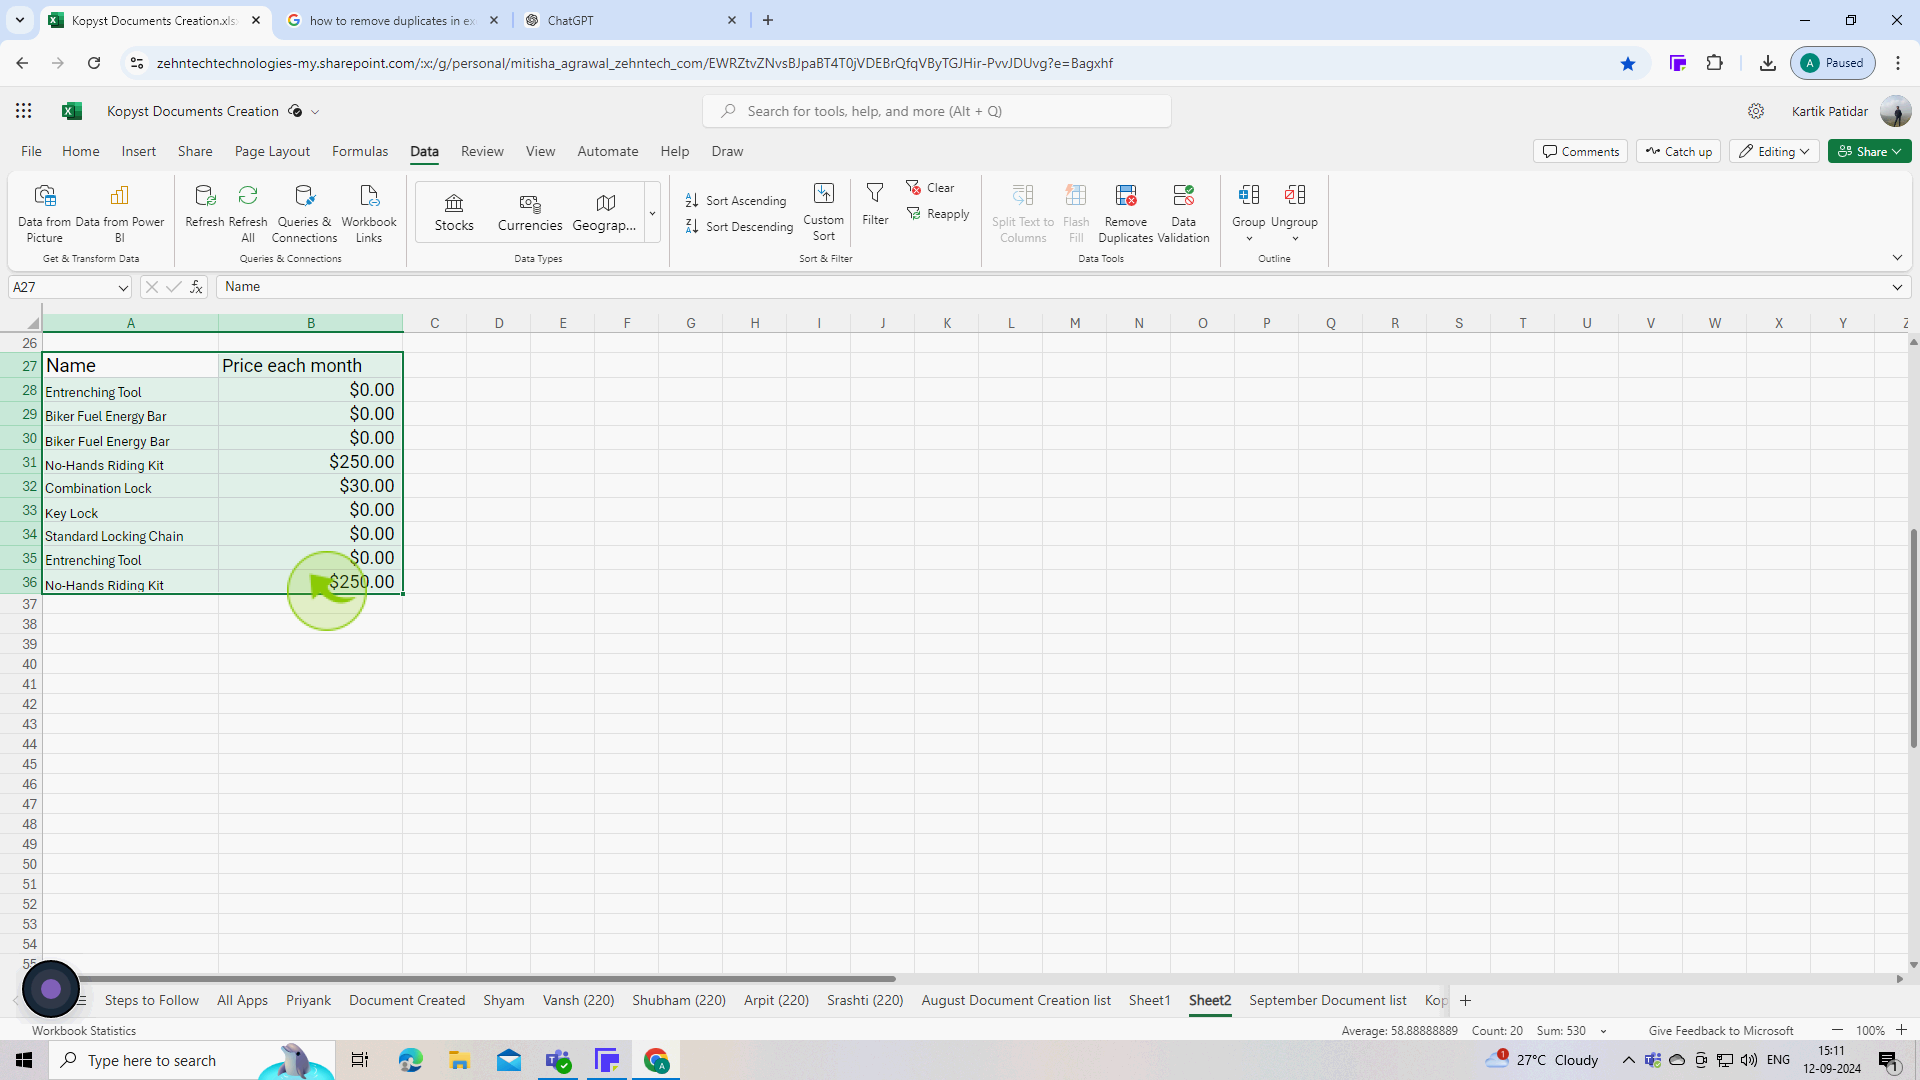
Select Your "Data"
Choose the range of cells where you want to remove duplicates. this can be a column or multiple columns, depending on your needs.
2
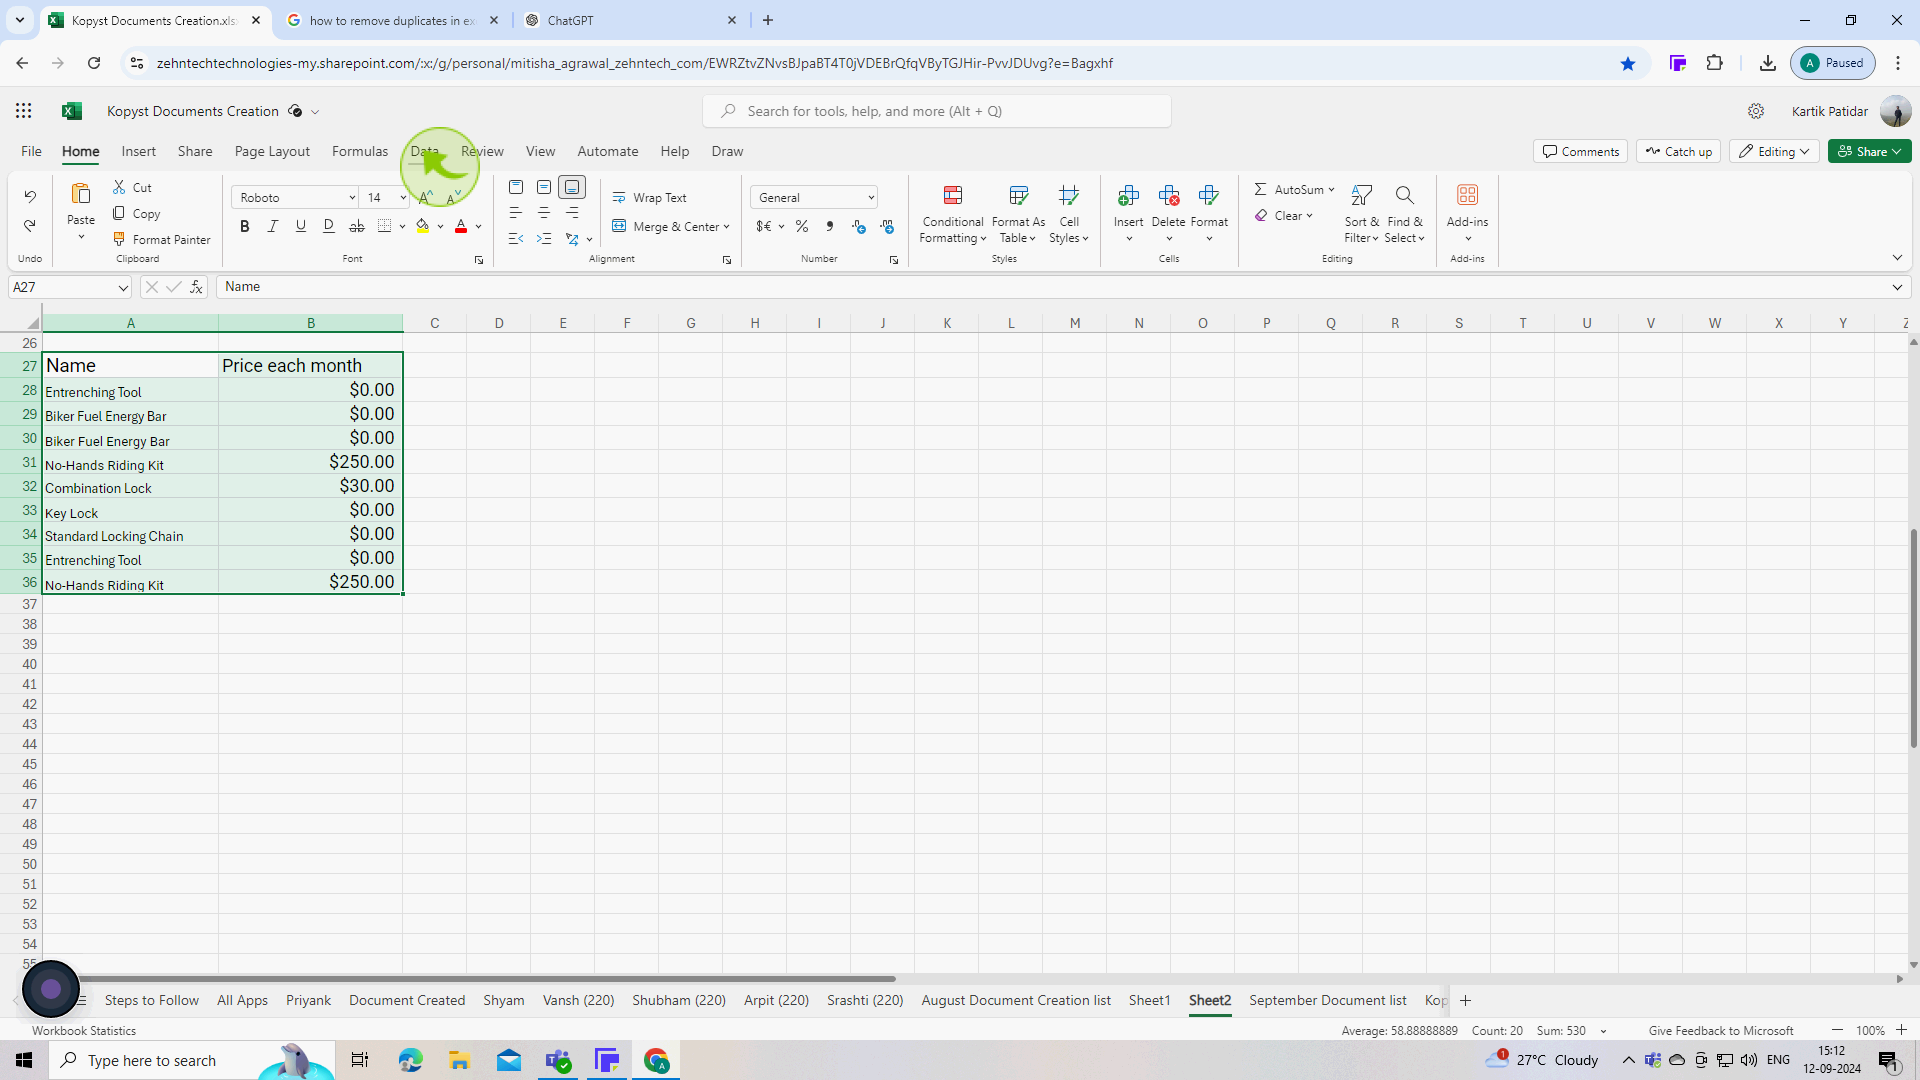
Click on the "Data" tab in the ribbon at the top of the excel window.
3
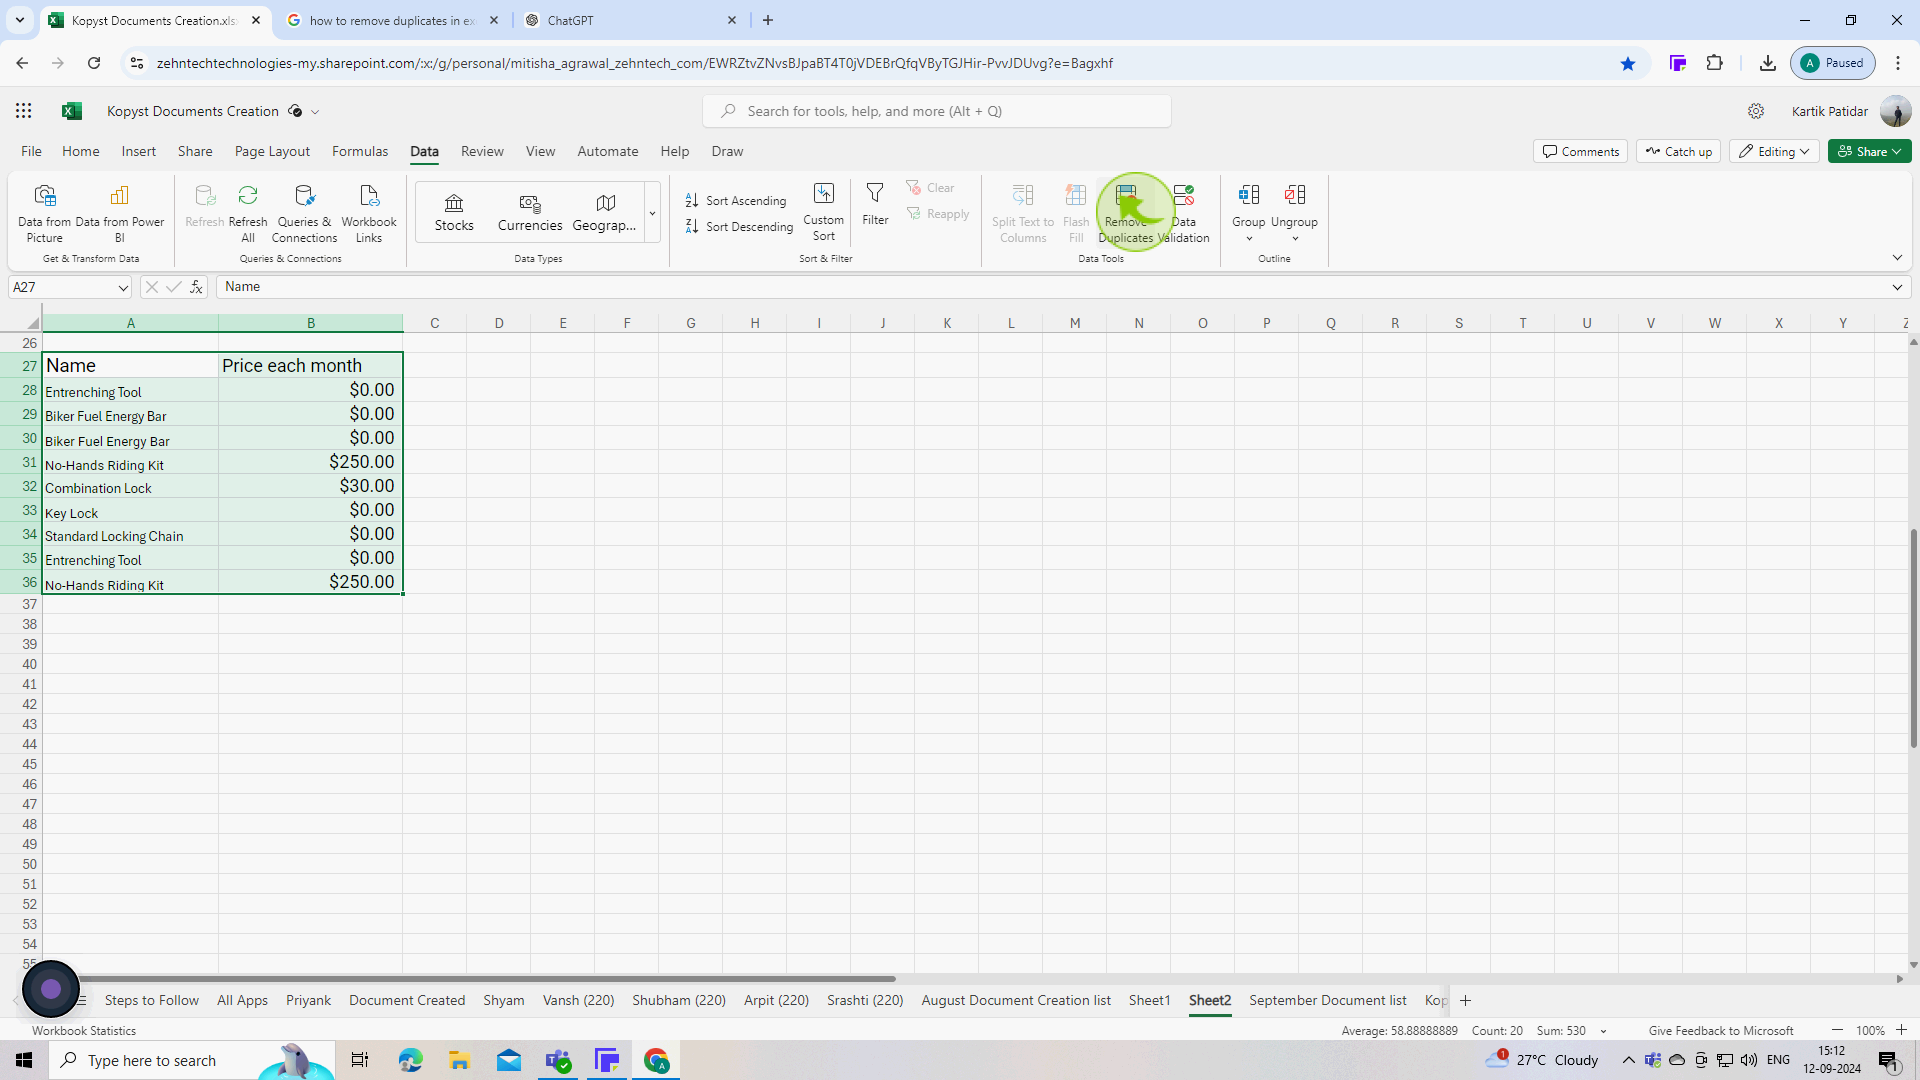
In the "Data Tools" group, find and click on the "Remove Duplicates" button.
Select remove duplicates option
4
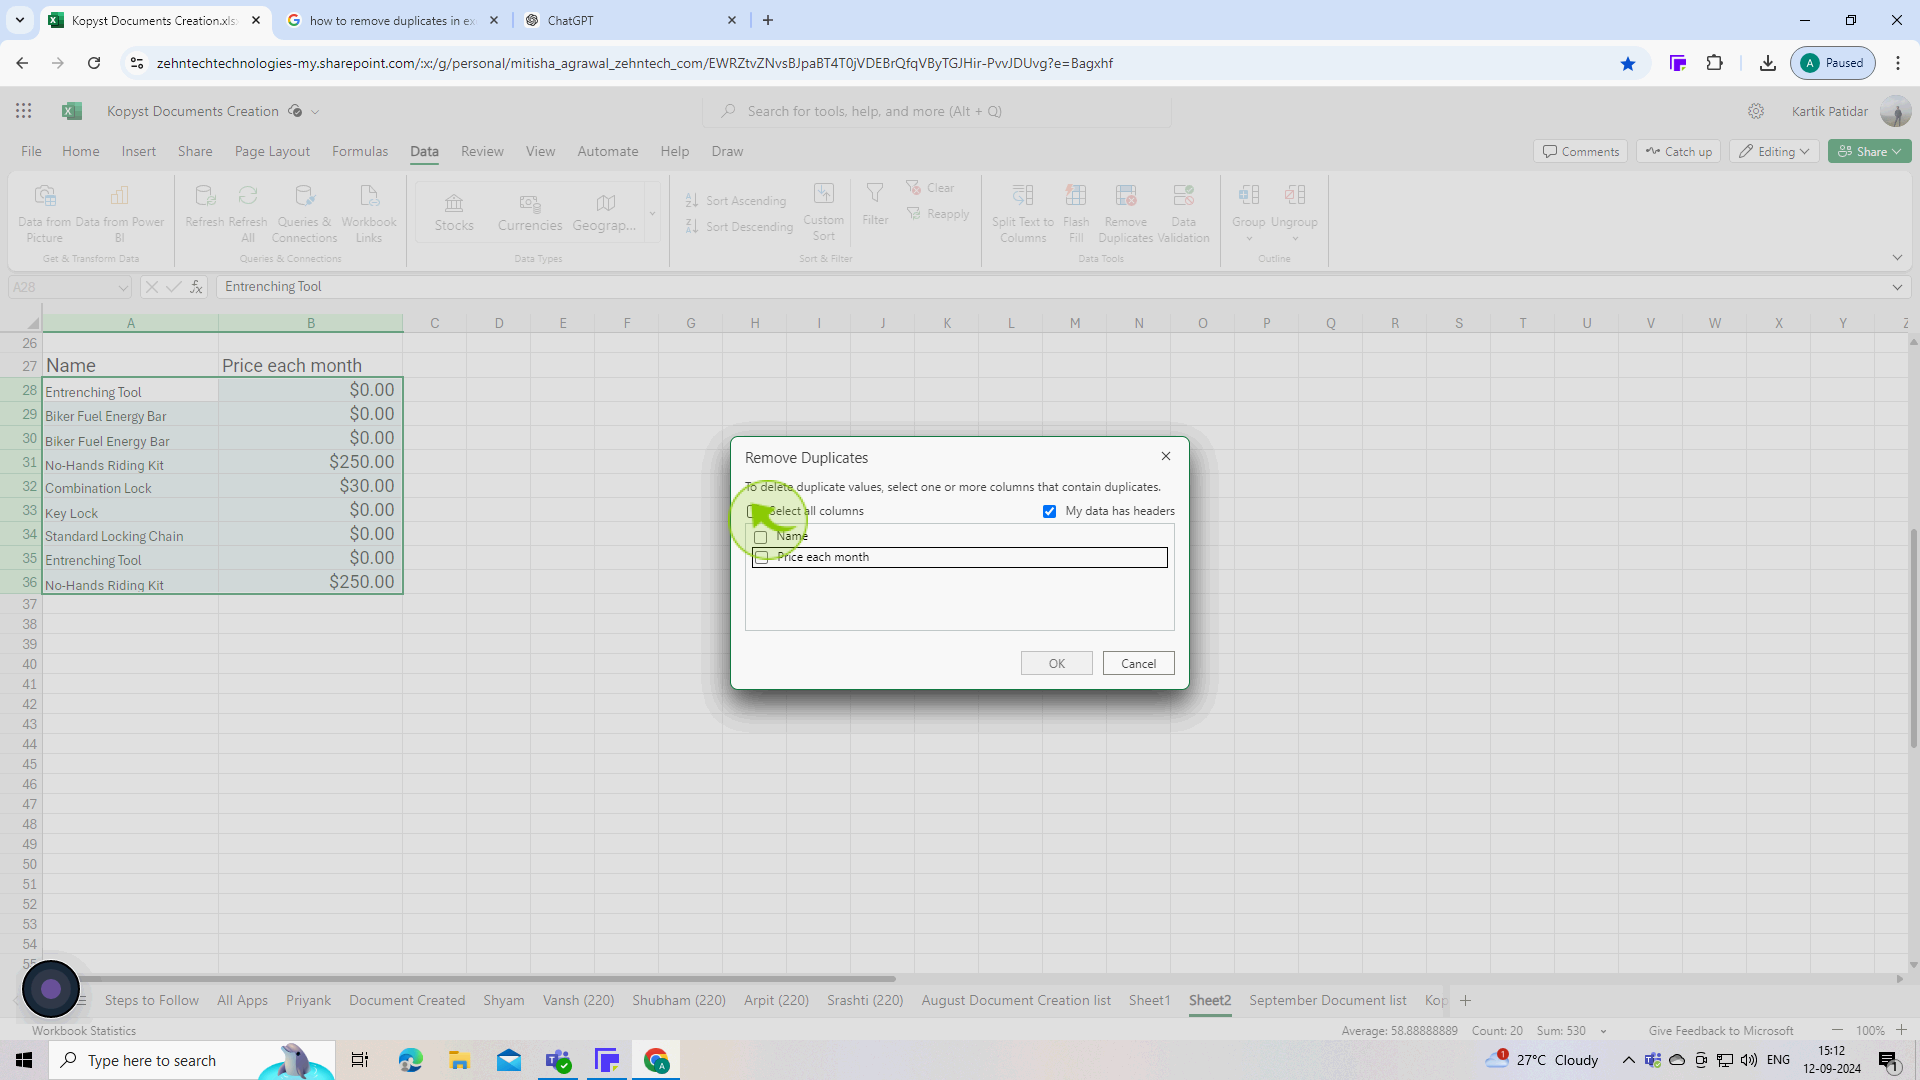
Choose the "Columns" that you want to check for duplicates.
In the dialog box, select the columns to check for duplicates and to remove rows with all duplicate columns, choose all columns.
5
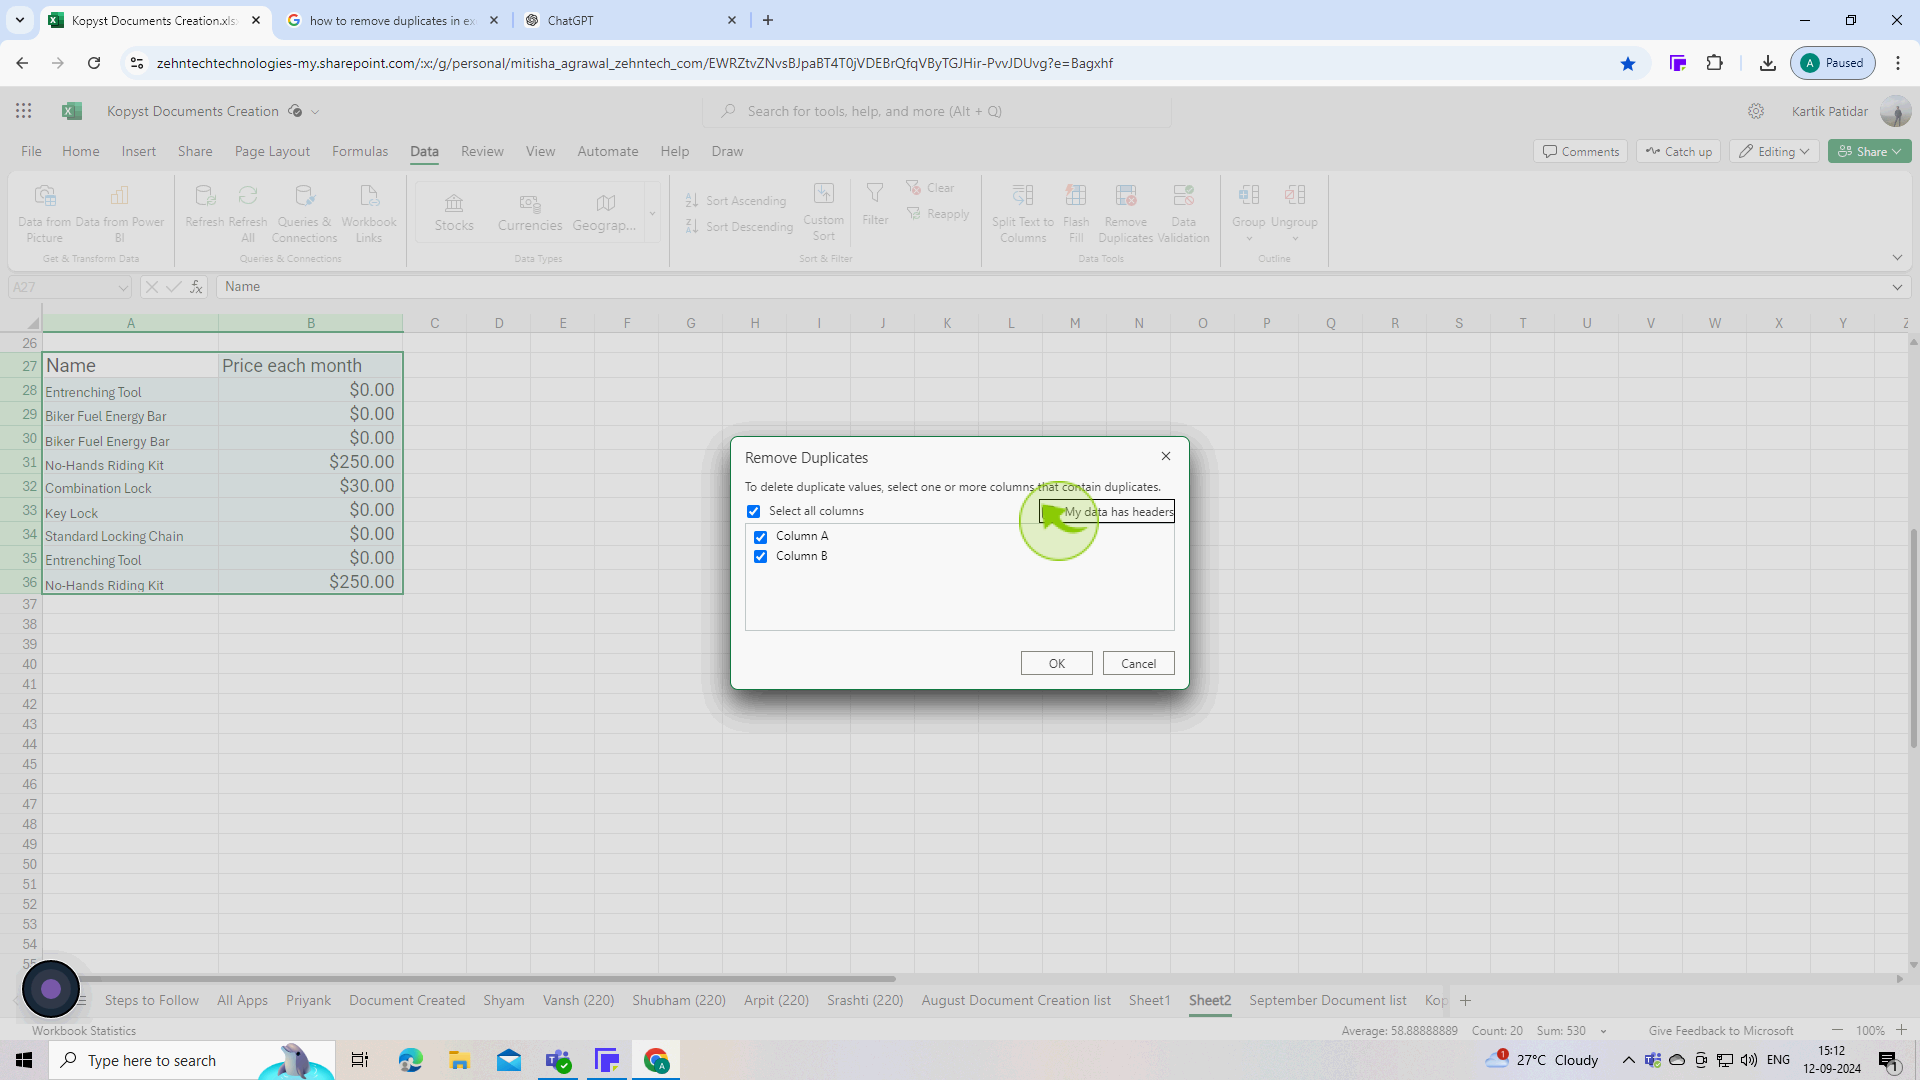
Check the box that says "My data has headers."
If your selected data includes headers, make sure to check the box that says my data has headers
6
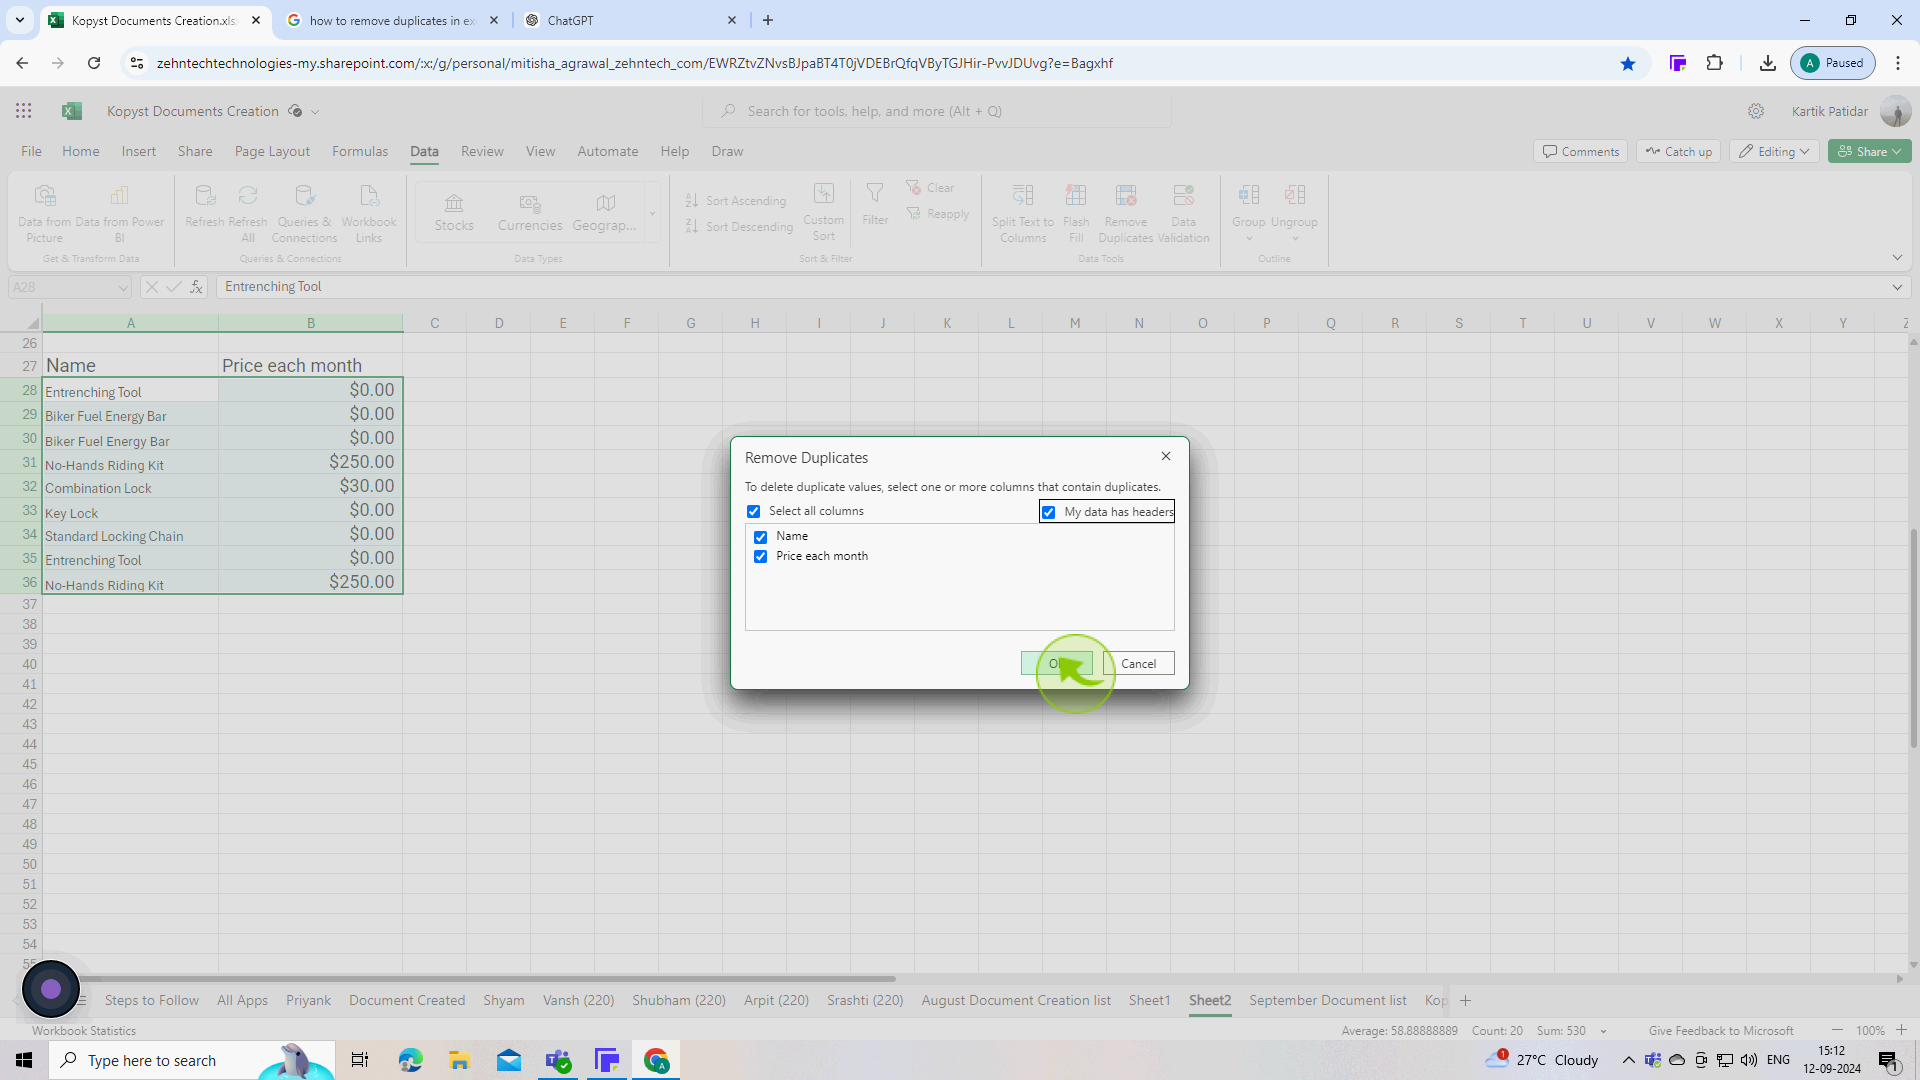
Click the "OK" button.
Excel will process the data and remove duplicates based on your selection.
7
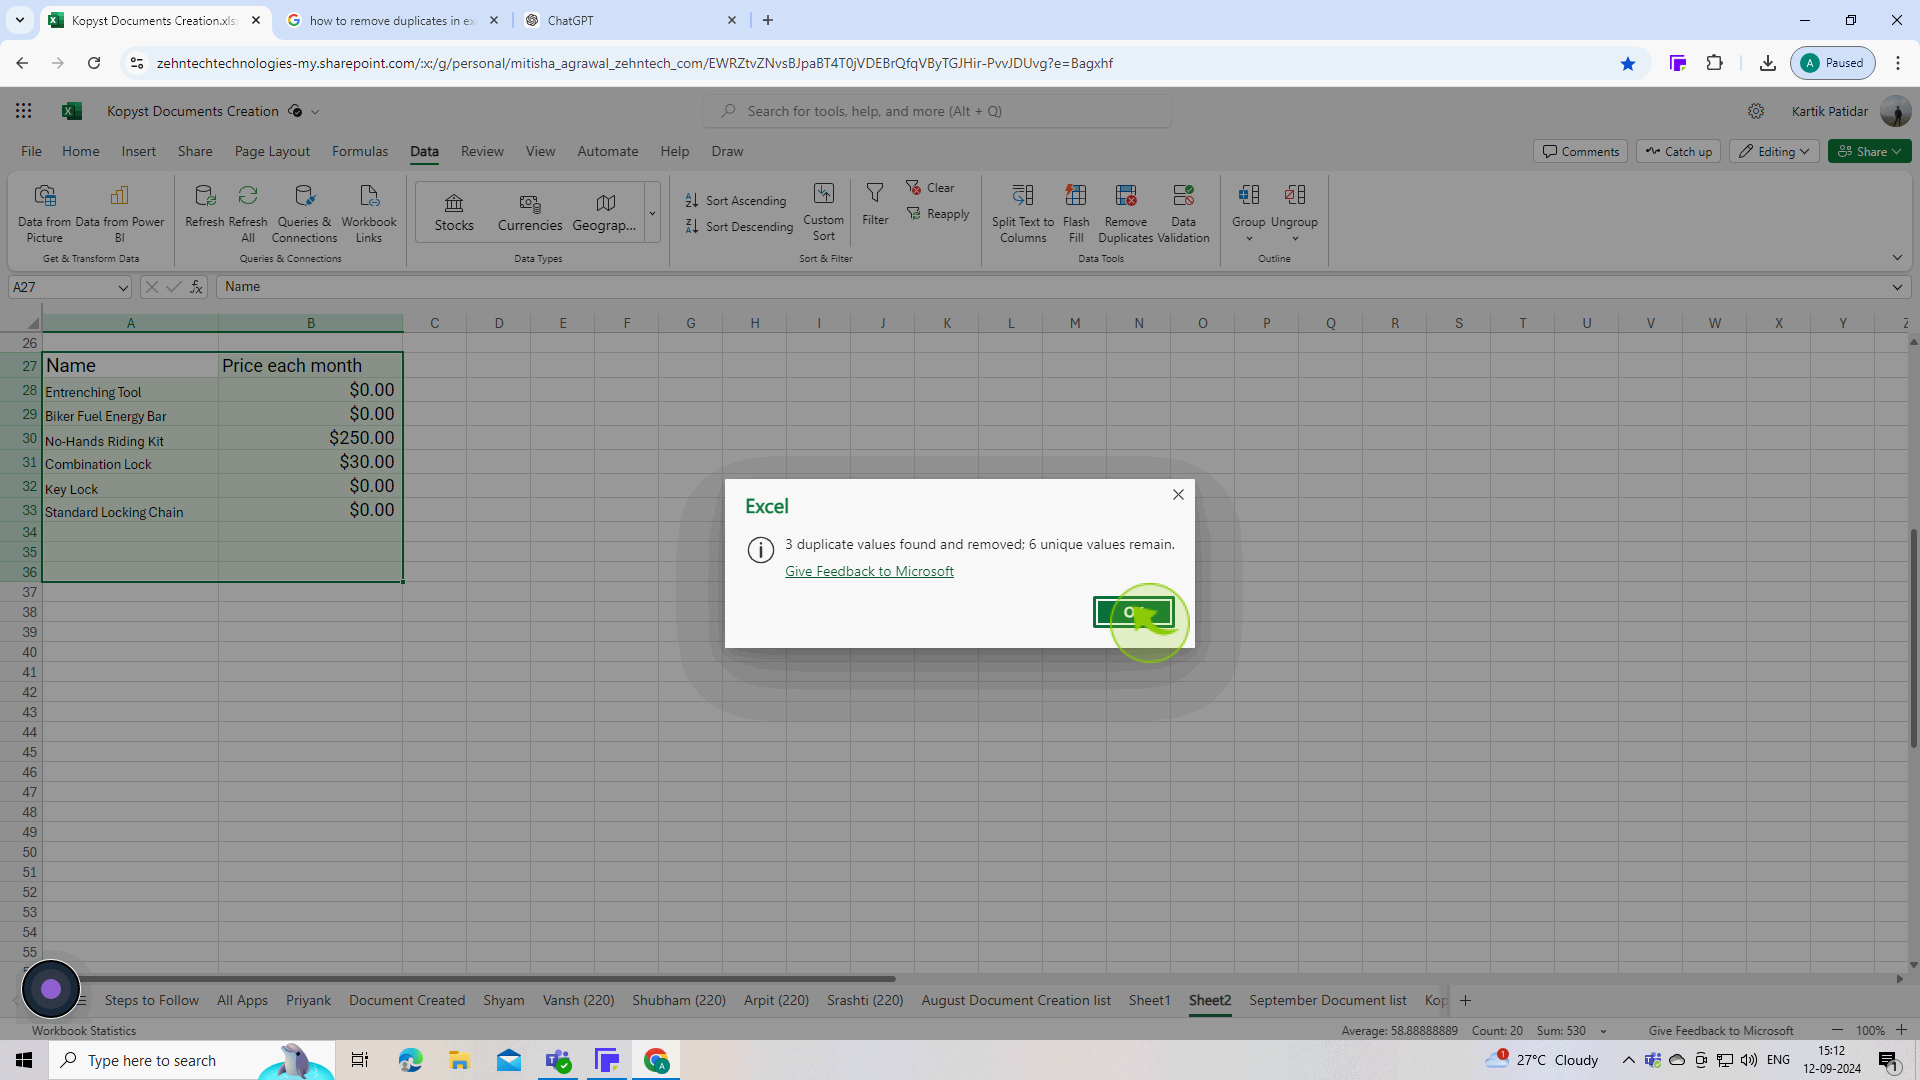
Click "OK"
A message box will pop up informing you how many duplicates were removed and how many unique values remain. click ok to close it.
8
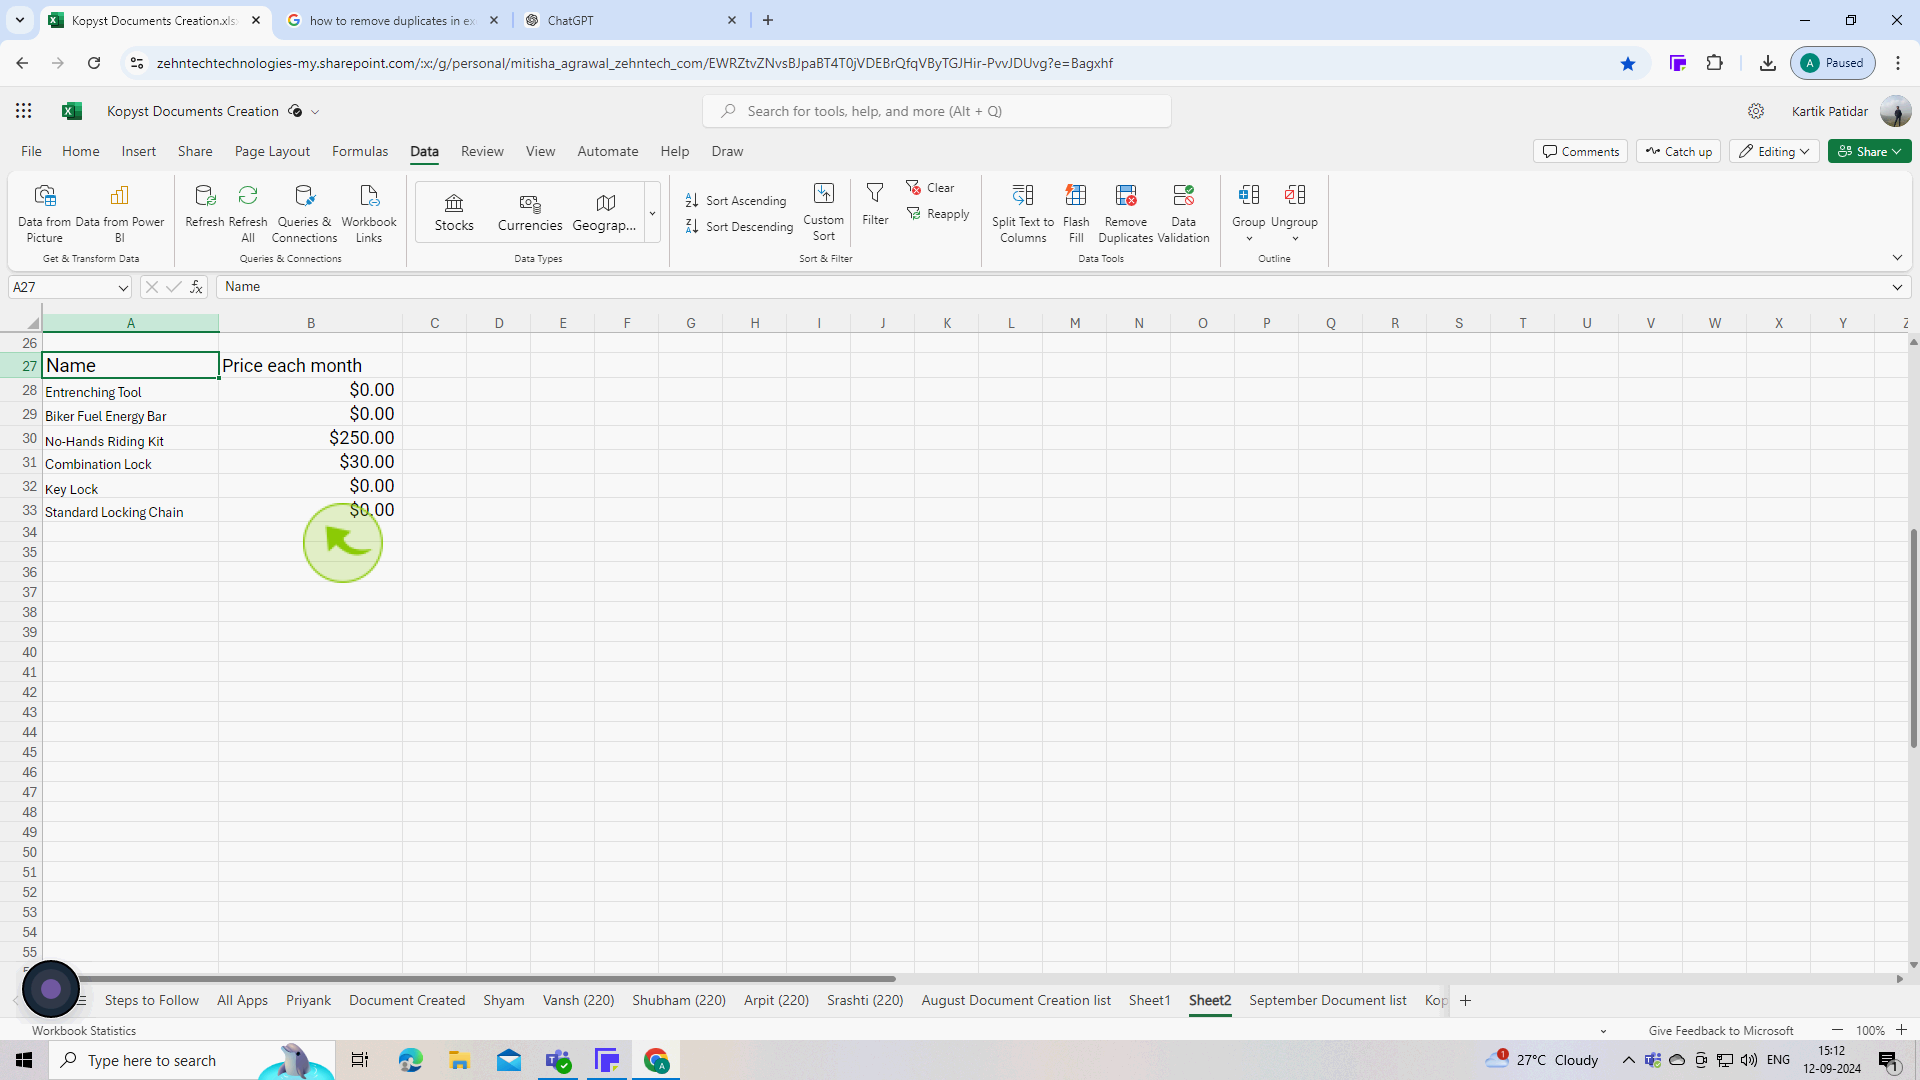
All duplicates have been successfully removed from the data
Duplicates removed successfully, and unique values are now displayed.
