How to add a column in Excel ?
|
 Excel
|
Sep 16, 2024
|
8 Steps
Learn how to quickly insert a new column into your Excel spreadsheet using the Home tab. This document will walk you through the simple steps involved. Discover how to add columns to the left or right of existing columns. Learn how to use keyboard shortcuts to streamline the process. By following these easy instructions, you can efficiently organize your data and improve the overall structure of your spreadsheets.
How to add a column in Excel ?
|
 Excel
|
8 Steps
1
Open your Microsoft Excel and open the workbook where you want to add a column.
2
Click on the lettered "Header" of the column immediately to the right of where you want the new column to appear.
The column you select will be the location where the new column is inserted to its left.

3
Go to the "Home" tab on the menubar

4
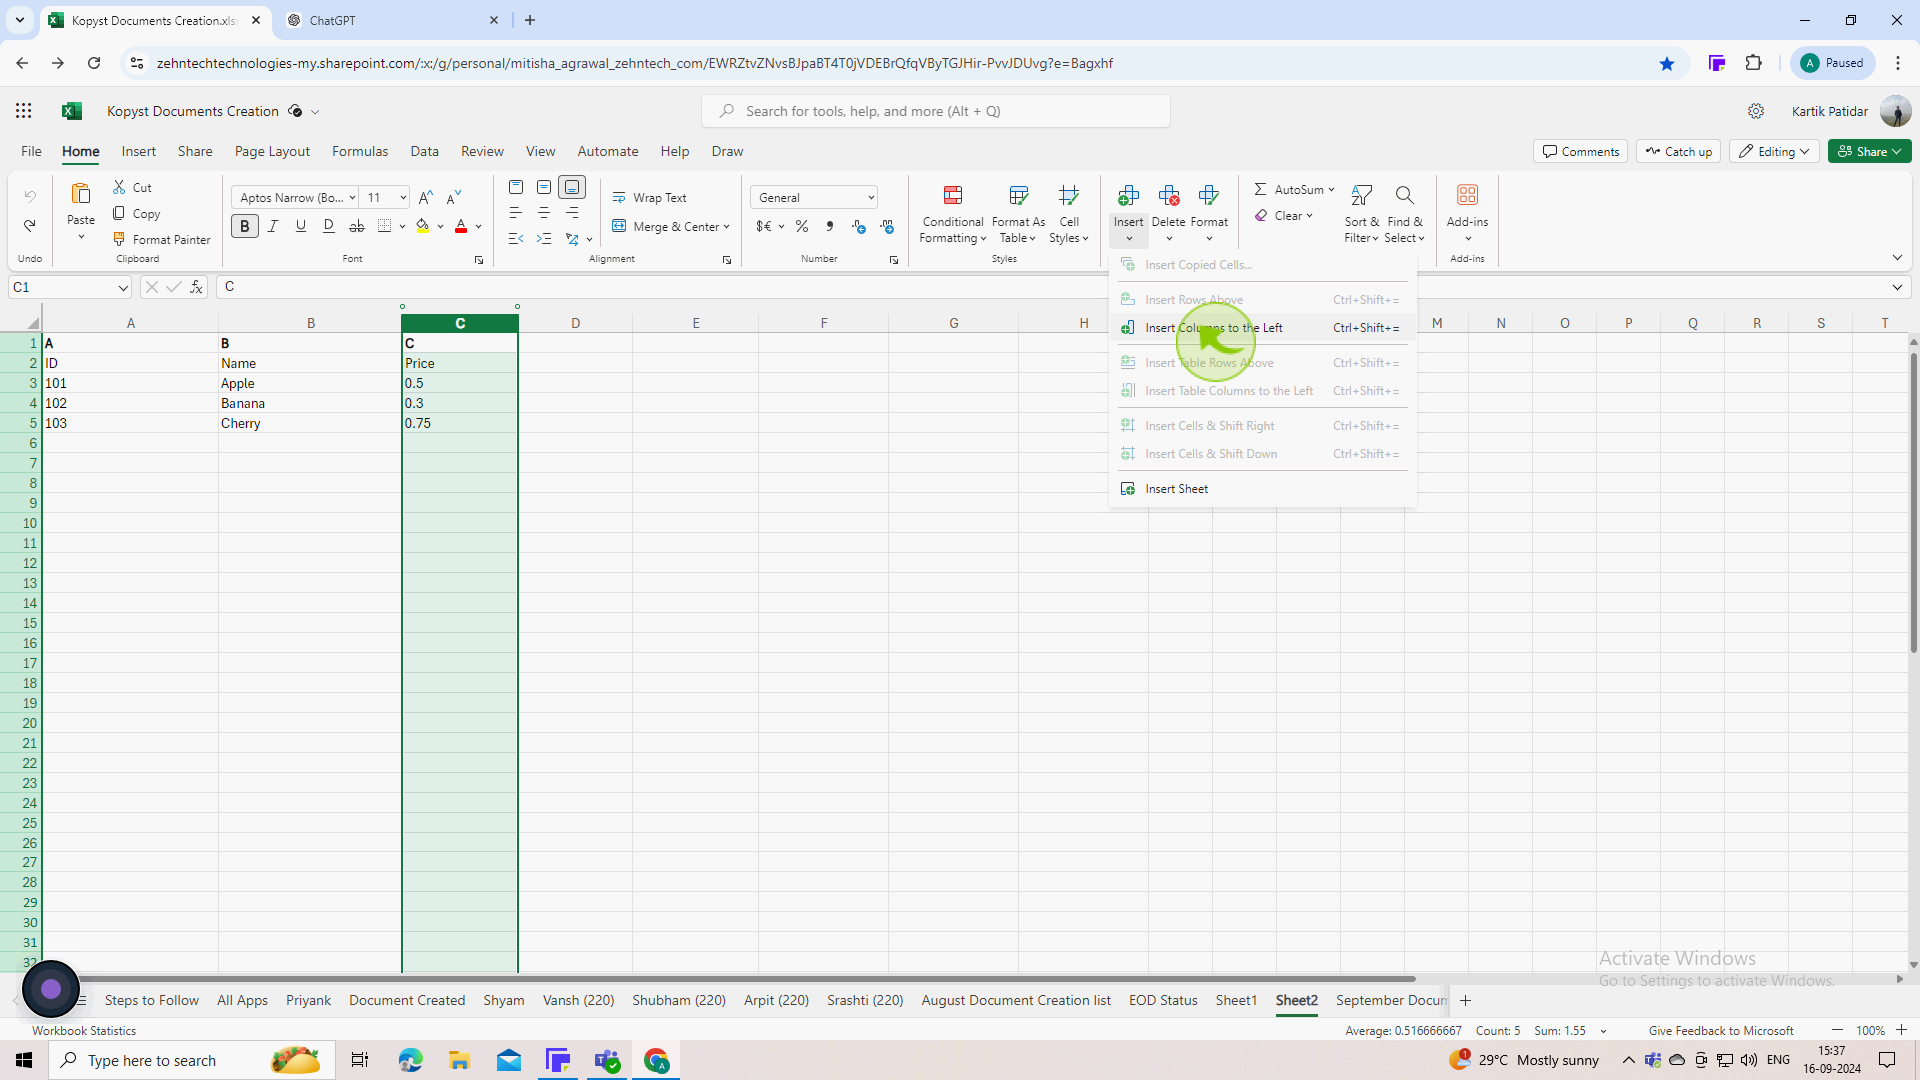
In the "Cells" group, click on "Insert"

5
Choose "Insert Columns to the Left"
The new column will be inserted to the left of the selected column.

6
Click and drag to adjust the "Width", or double click to autofit based on the content.
Adjusting the width ensures that the new column fits your data and maintains the readability of your worksheet.

7
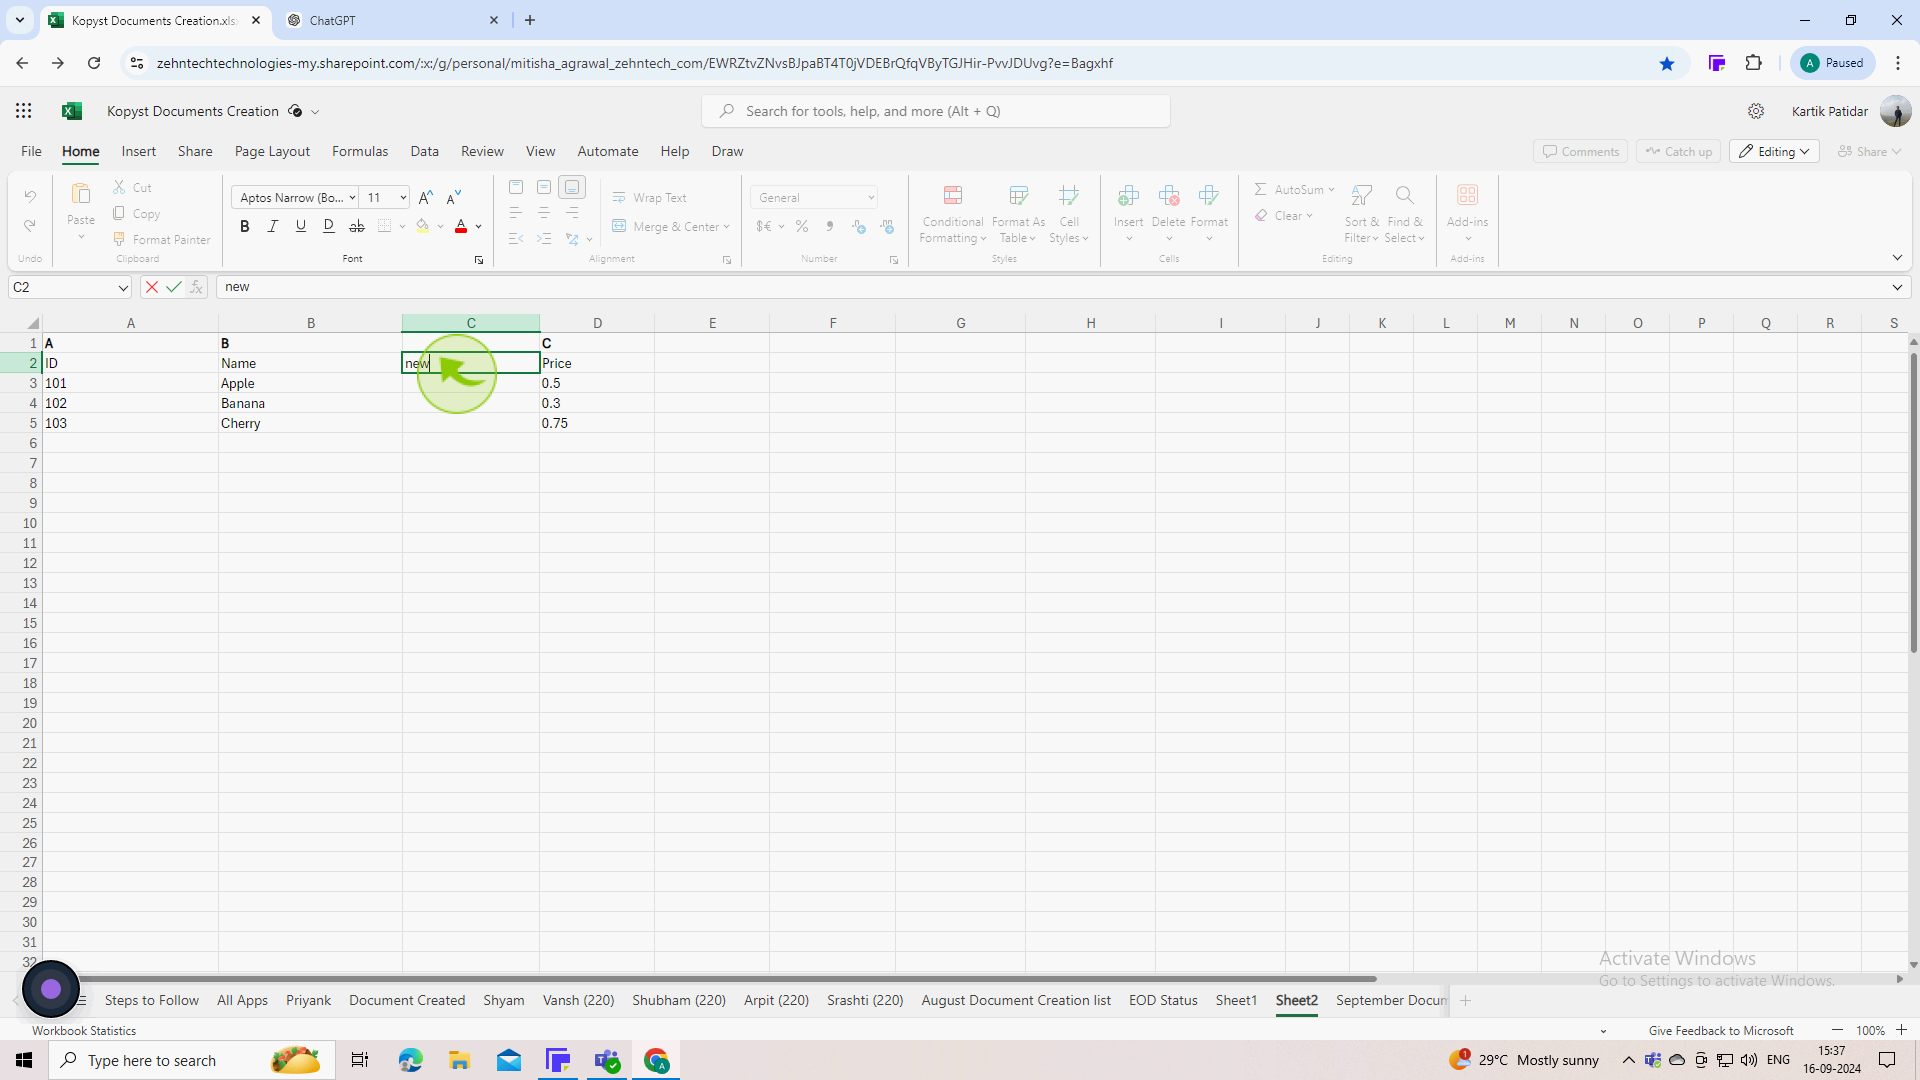
Click on the "Cells" in the new column and start typing your data.
You can now enter or paste any information into the newly added column as needed.

8
Click on "File" in the top left corner and then select "Save," or press Ctrl + S on your keyboard.
Ensure you save your changes to avoid losing the new column you’ve added

